Soft Cream Cheese Thumbprint Cookies with Raspberry Jam
Last Updated on February 9, 2026 by Kiersten James
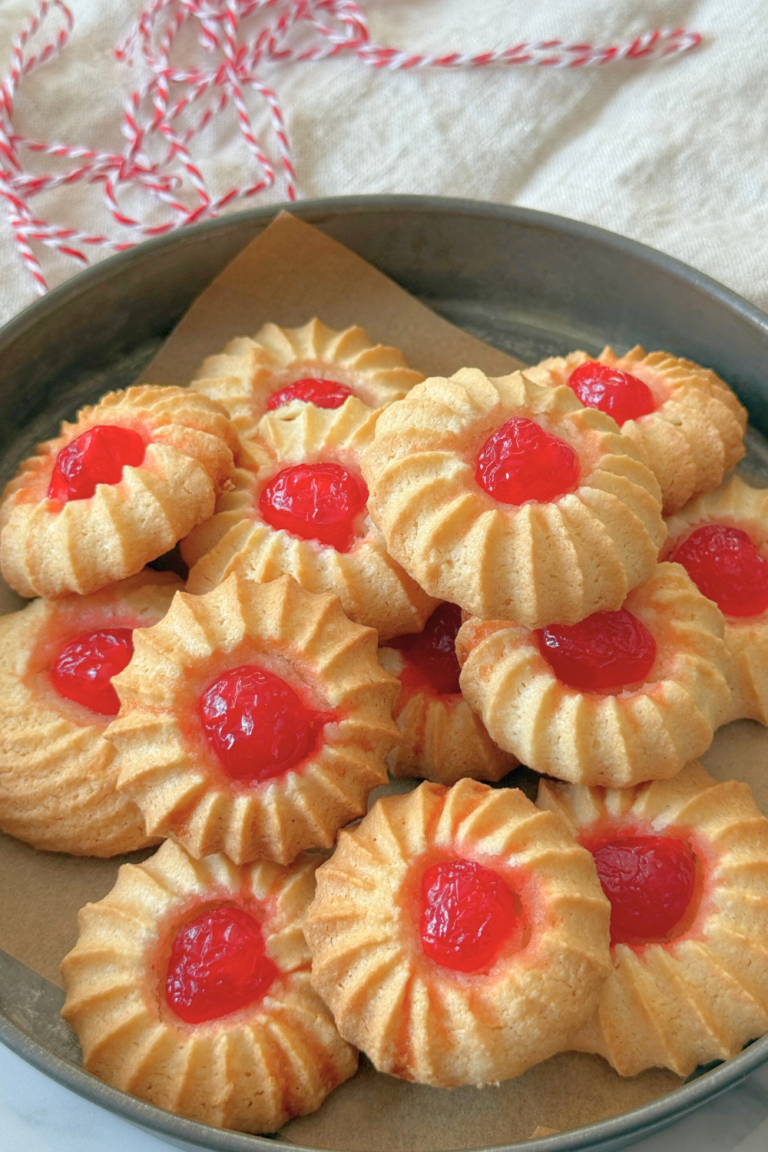
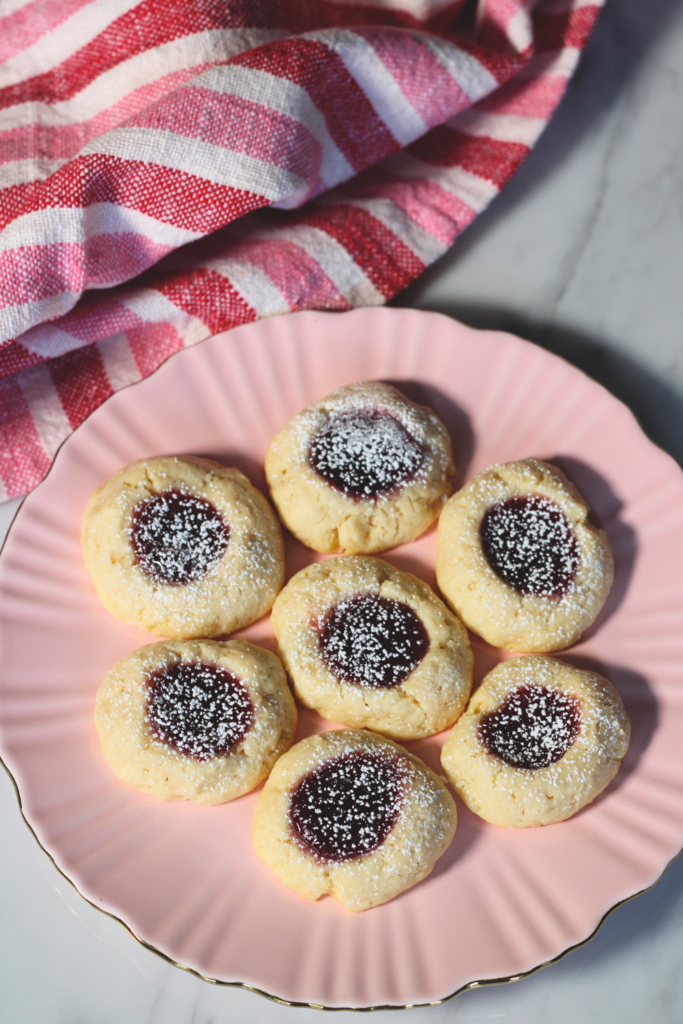
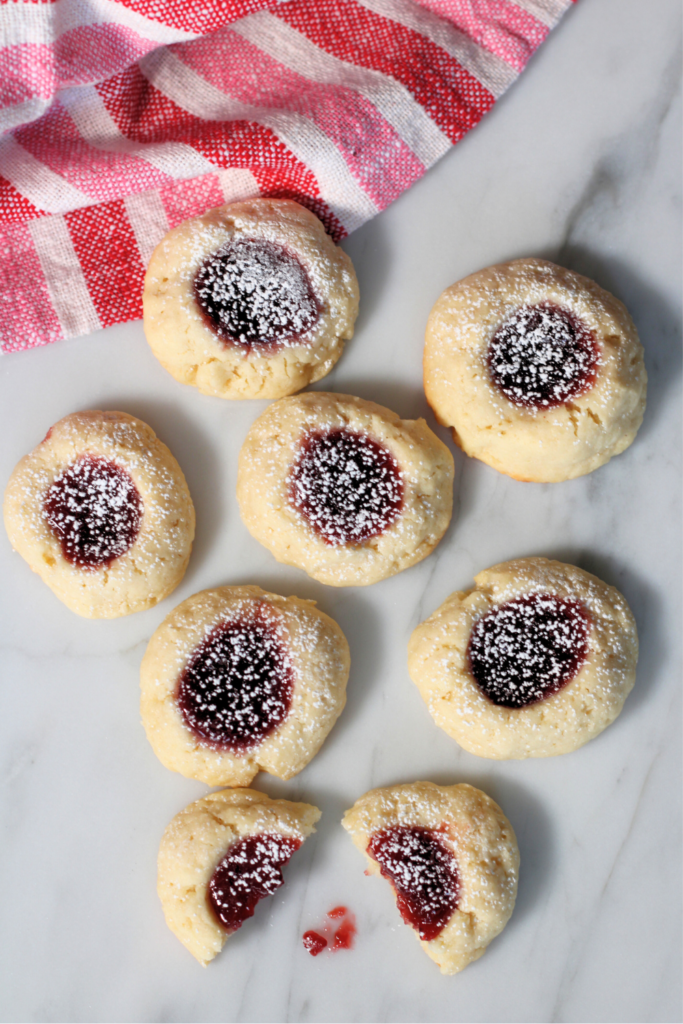
Soft cream cheese thumbprint cookies filled with raspberry jam, made from a decades-old family recipe. These classic cookies stay tender, don’t spread, and bake up perfectly every time.

These cream cheese thumbprint cookies are soft, rich, and exactly what you expect when you pick one up – tender dough, a jam-filled center, and just enough sweetness without being over the top.
This recipe comes from my mother-in-law and has been made the same way for decades.
The cream cheese keeps the cookies from spreading, the dough holds its shape, and the jam bakes right into the center instead of sliding off. They’re simple, dependable, and always one of the first cookies gone at Christmas.
This recipe yields a large batch of about 70 cookies for holiday trays and cookie swaps. If you don’t want to make that many, you can cut the recipe in half and they will still be perfectly fine.
Why You’ll Love These Cream Cheese Thumbprint Cookies
- Soft, bakery-style texture that stays tender
- Just sweet enough without being too much
- Easy to make for a crowd or size down for a small batch
- A classic cookie that everyone recognizes, and never goes out of style
Quick Allergy Check!
For my beloved friends who have different dietary needs, I see you and want you to feel safe.
These cream cheese thumbprint cookies contain the following allergens:
- Dairy
- Eggs
- Wheat
Ingredients You’ll Be Using:
Unsalted butter: This dough is butter forward, so quality matters. Fully softened butter helps the cookies bake evenly and keeps the texture rich without becoming greasy.
Granulated sugar: Keeps these cookies light and clean tasting. They’re not meant to be overly sweet due to the jam filling.
Cream cheese: Gives the cookies their soft interior and keeps them from spreading. Use full fat, block style cream cheese only. Do not use reduced fat or whipped.
Eggs: Bind everything together and give the cookies structure so they don’t crumble when picked up.
Lemon juice: You won’t taste this at all. It simply cuts the richness and keeps the dough from feeling heavy.
Salt: Essential. Without it, the cookies taste flat once the jam is added.
All purpose flour: Gives just enough structure without drying the cookies out.
Baking powder: A small amount provides lift so the cookies bake up soft instead of dense.
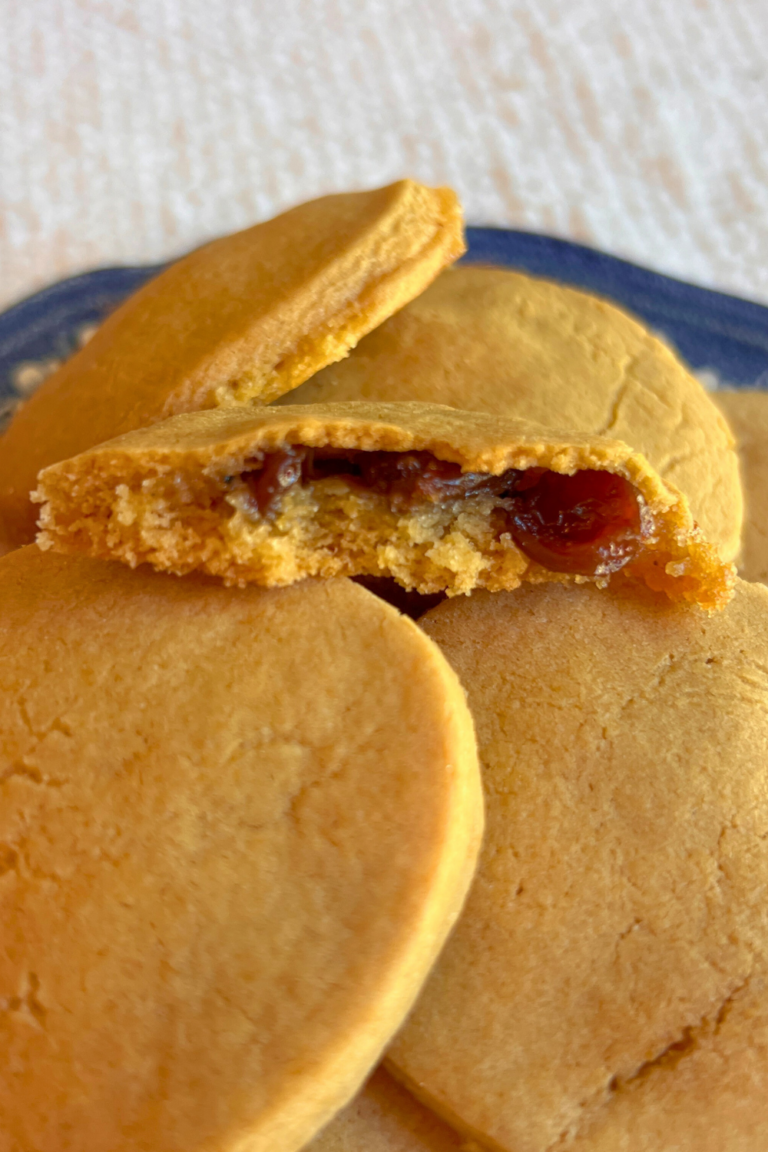
Seedless raspberry preserves: Raspberry is classic and slightly tart, which balances the rich dough. Any thick jam works, but thin jams will bubble and spread.
Confectioner’s sugar: A light dusting finishes the cookies without overpowering them.
Tips for the Best, Bakery Style Thumbprint Cookies Ever
Use fully softened butter and cream cheese
Both should be soft enough to mix easily, but not warm or greasy. This helps the dough come together smoothly and keeps the cookies from spreading too much.
Don’t overmix the dough
Once the flour is added, mix only until everything comes together. Overmixing can make the cookies tougher instead of soft.
Make deep thumbprints
Press deeper than you think you need to. The dough will puff up slightly as it bakes, and a shallow thumbprint will disappear in the oven.
Use thick jam, not jelly
A thicker preserve stays in place and bakes neatly into the center. If the jam is too runny, it can bubble up and spill over the sides. Still delicious, just not as pretty.
Bake until just set, not browned
These cookies should be pale on top with lightly golden bottoms. Overbaking is the fastest way to dry them out.
What if the centers puff up?
That’s normal with this dough. If needed, gently press the centers back down right out of the oven with the back of a greased measuring teaspoon.
Can I switch the jam?
Yes! Apricot, strawberry, or cherry all work well. Just keep it thick. I prefer seedless for texture reasons.
Freezing & Make-Ahead Instructions
The dough can be refrigerated for up to 2 days or frozen for later use. Thaw and use the frozen dough within a month for optimal texture and taste.
How to Make Cream Cheese Thumbprint Cookies with Raspberry Jam
Equipment I Use:
- Stand Mixer
- Paddle Attachment
- LIFE CHANGING flour funnel my husband got for me
- Cookie Scoop (medium 2 tablespoon size)
- Baking Sheet
Ingredients:
- 1 1/2 cups unsalted butter, softened
- 1 1/2 cups granulated sugar
- 8 ounces full-fat cream cheese, softened
- 2 large eggs
- 2 tablespoons lemon juice
- 1 teaspoon salt
- 4 1/2 cups all-purpose flour
- 1 1/2 teaspoons baking powder
- Seedless raspberry preserves
- Confectioner’s sugar, for garnish
Overview:
Set up your oven: Move the racks to the middle and preheat the oven to 350 degrees F. Line a cookie sheet with parchment paper or use silicone baking mats.
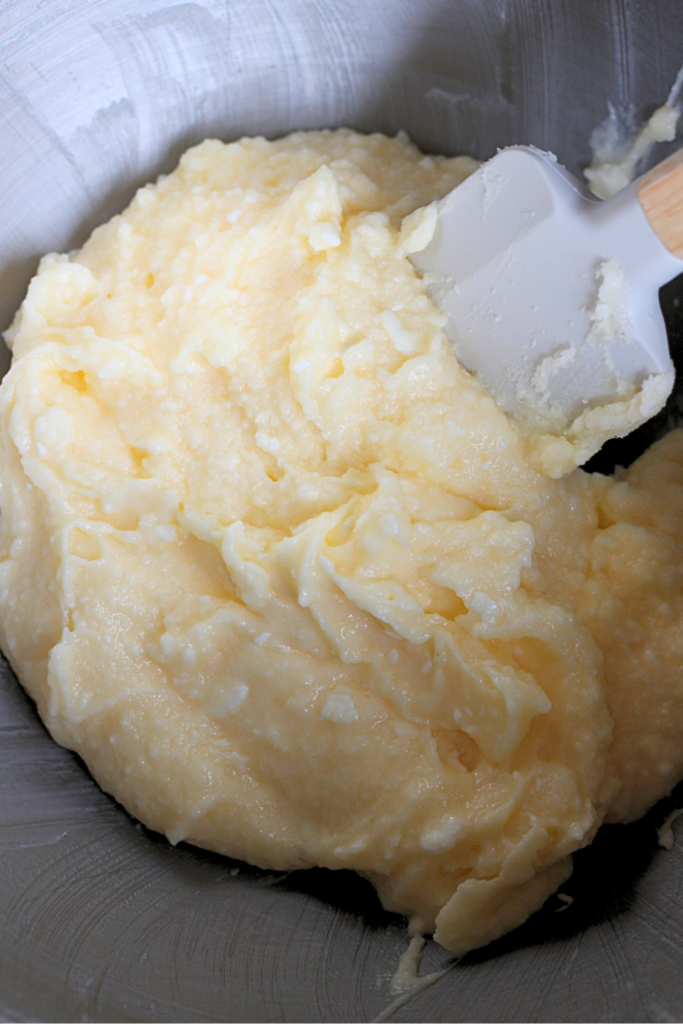
Cream the sugar and fats: Using the paddle attachment on a stand mixer, cream together the butter and granulated sugar on medium-high speed until light and fluffy – about 3 minutes.
Whisk the dry ingredients: In a separate bowl, whisk together the flour, baking powder, and salt. Set aside.
Combine ingredients in the mixer: Turn the mixer off, add the eggs, lemon juice, and cream cheese. Mix on low speed until well combined. Scrape down the bowl here and there, as needed.
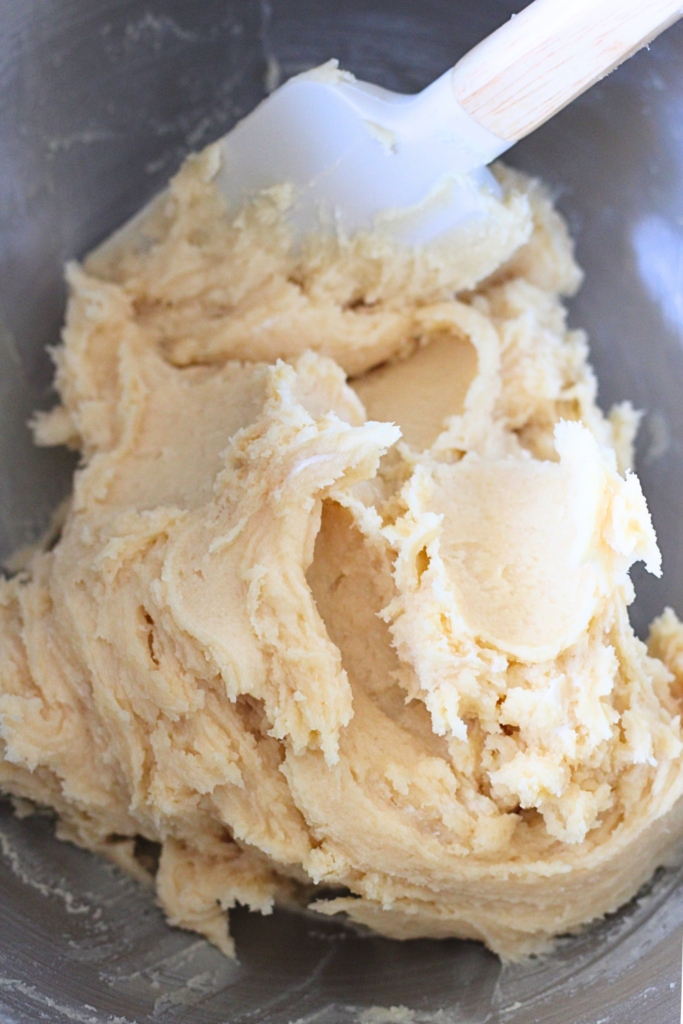
Next, add the dry flour mixture a little at a time, also on low speed, until no clumps of white flour remain. Do not overmix; turn the mixer off as soon as the flour is no longer white.
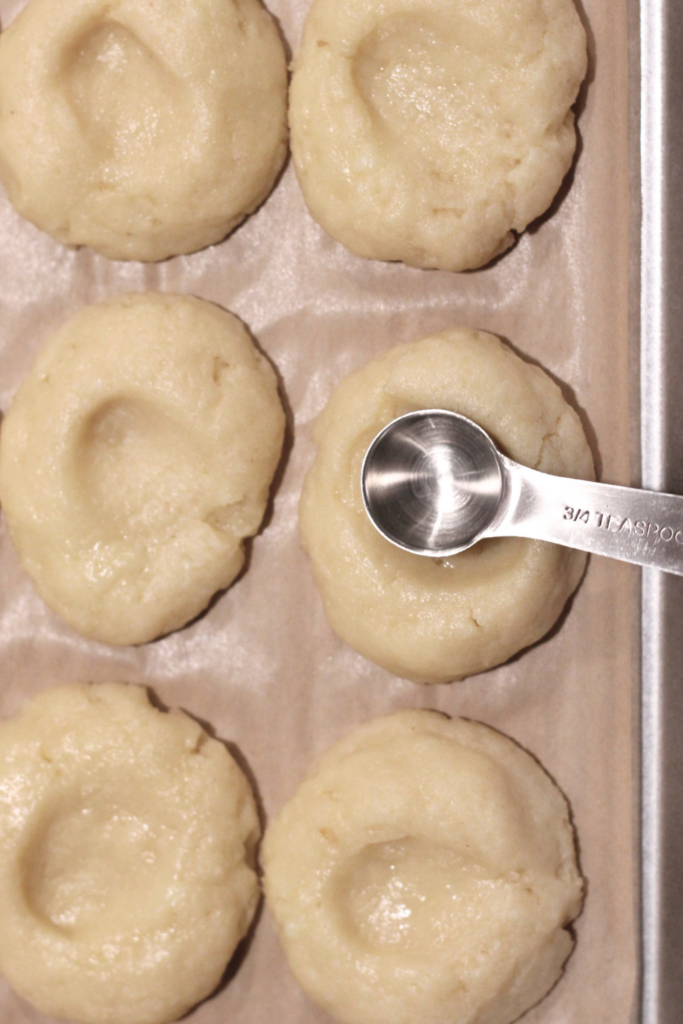
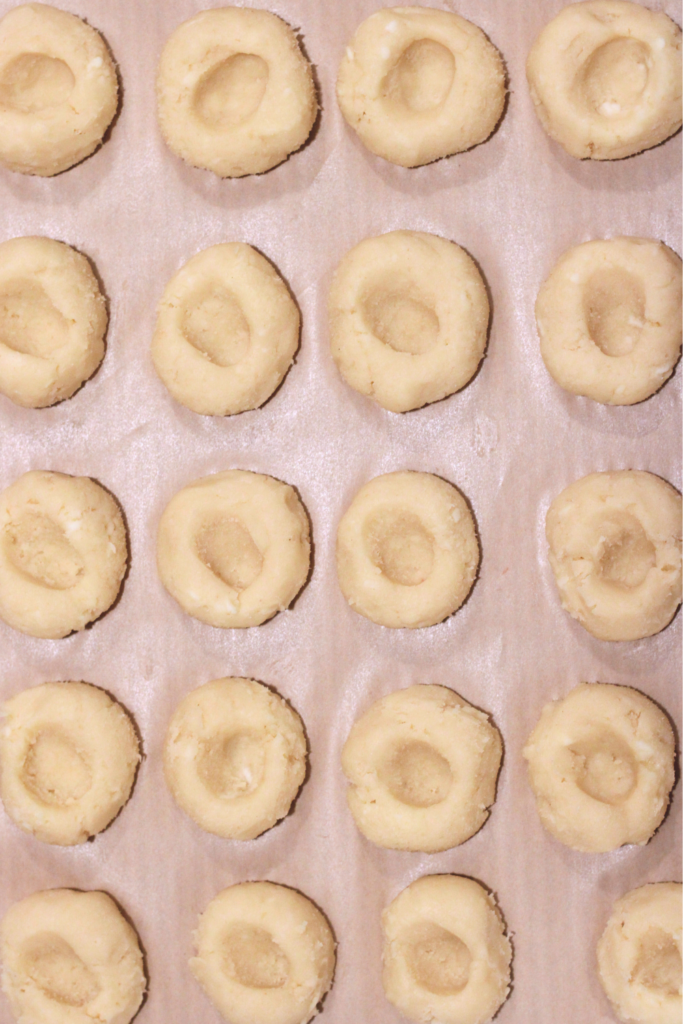
A 1-tablespoon cookie scoop makes the next much faster and produces uniform cookies that are nearly exact in size. If you don’t have one, no sweat, a measuring tablespoon and your hands are perfectly fine!
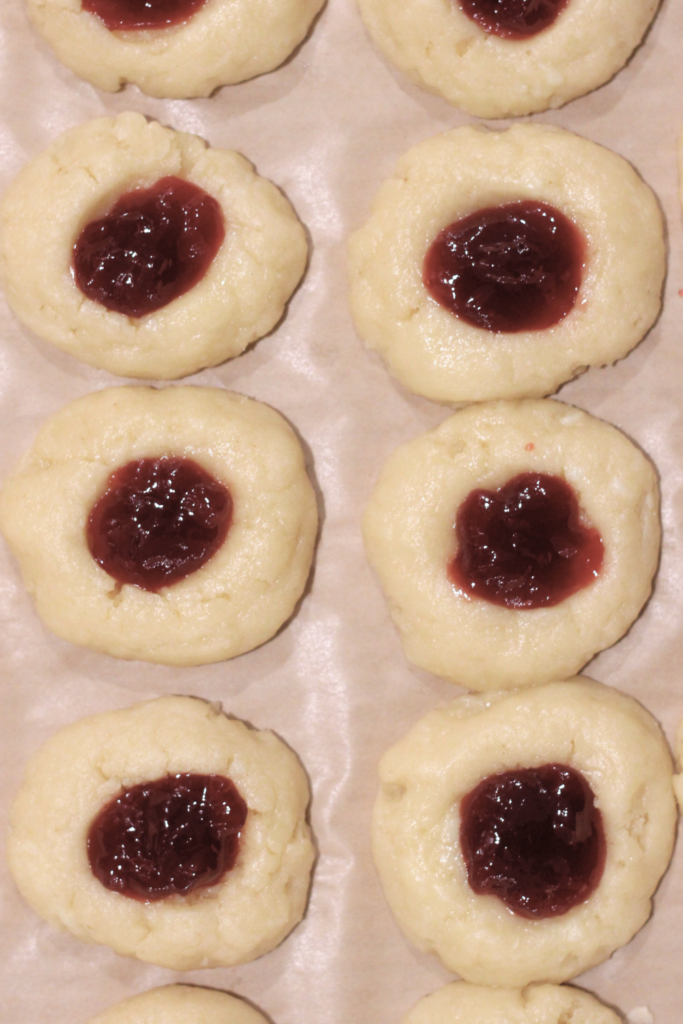
Scoop the dough, roll into balls with your hands, and place about an inch apart on a lined cookie sheet. The dough should roll very easily without leaving much residue on your hands.
Indent each ball of dough with your thumb, and smooth any cracks that appear with your finger.
Bake & Fill: Bake the cookies at 350 degrees F for 10 minutes, rotating the cookie sheets halfway through baking.
Remove the cookies from the oven for filling. If the indents puffed up a bit, grease the back of a measuring teaspoon and push the centers back down before filling.
Fill each indent with about 1/2 teaspoon of preserves. This is easiest if you use a piping bag or storage bag with 1/4″ of the corner snipped off.
Once filled, continue baking the cookies in the oven for an additional 12-14 minutes, again rotating the cookie sheets halfway through. They will be finished baking when they are very lightly golden around the edges and bottoms. Do not allow the cookies to brown.
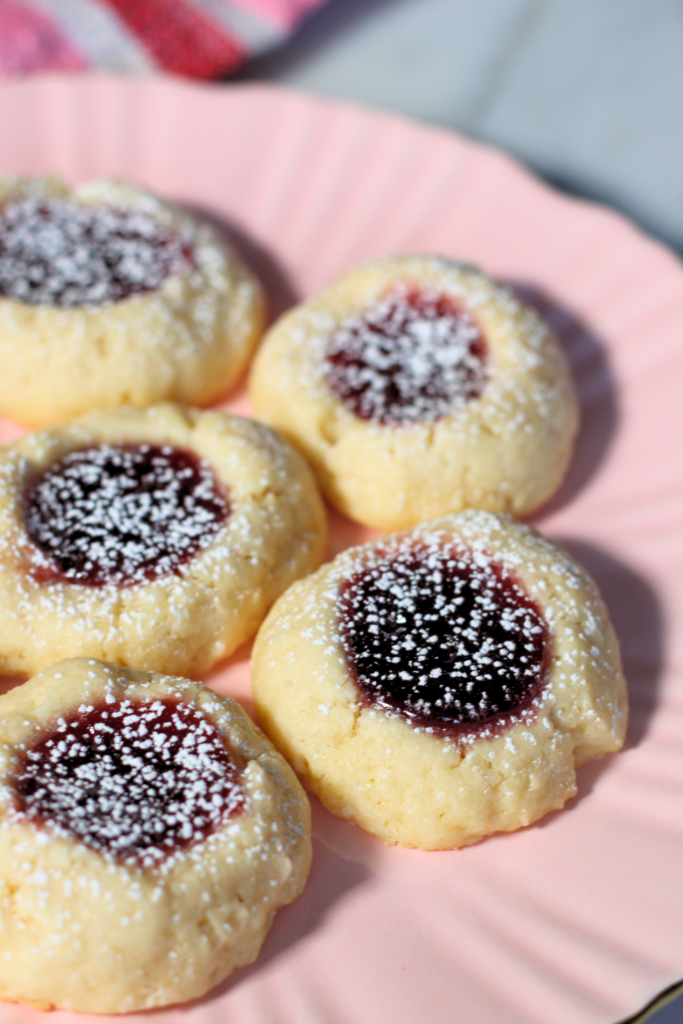
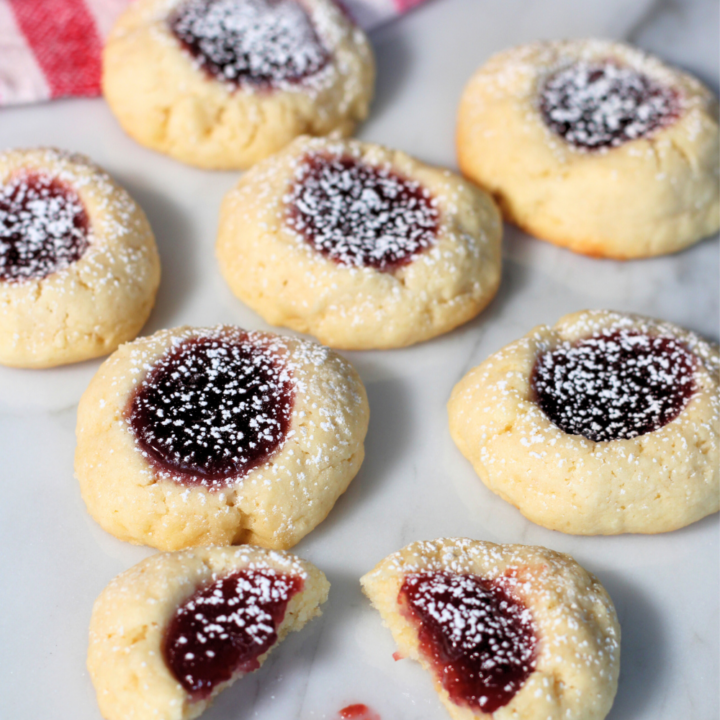
Rest & Garnish: Allow the cookies to rest undisturbed on the cookie sheet for 10 minutes. Transfer to a wire cooling rack after that time and allow to cool completely.
Garnish with confectioner’s sugar and a sifter or mesh sieve before serving and storing.
The Best Way to Store Jam Filled Thumbprint Cookies
Do not refrigerate them
The refrigerator will dry the cookies out and can make the jam sticky instead of set.
Avoid plastic bags
Plastic storage bags will trap moisture and make the cookies soggy or tacky.
A cookie tin at room temperature is ideal.
These cream cheese thumbprint cookies stay soft for weeks. The fat from the butter and cream cheese keeps the dough from drying out, and the jam helps to seal in the moisture.
Soft Cream Cheese Thumbprint Cookies with Raspberry Jam
Soft cream cheese thumbprint cookies filled with raspberry jam, made from a decades-old family recipe. These classic cookies stay tender, don’t spread, and bake up perfectly every time.
Ingredients
- 1 1/2 cups unsalted butter, softened
- 1 1/2 cups granulated sugar
- 8 ounces full-fat cream cheese, softened
- 2 large eggs
- 2 tablespoons lemon juice
- 1 teaspoon salt
- 4 1/2 cups all-purpose flour
- 1 1/2 teaspoons baking powder
- Seedless raspberry preserves
- Confectioner’s sugar, for garnish
Instructions
Set up your oven: Move the racks to the middle and preheat the oven to 350 degrees F. Line a cookie sheet with parchment paper or use silicone baking mats.
Cream the sugar and fats: Using the paddle attachment on a stand mixer, cream together the butter and granulated sugar on medium-high speed until light and fluffy - about 3 minutes.
Whisk the dry ingredients: In a separate bowl, whisk together the flour, baking powder, and salt. Set aside.
Combine ingredients in the mixer: Turn the mixer off, add the eggs, lemon juice, and cream cheese. Mix on low speed until well combined. Scrape down the bowl here and there, as needed.
Next, add the dry flour mixture a little at a time, also on low speed, until no clumps of white flour remain. Do not overmix; turn the mixer off as soon as the flour is no longer white.
A 1-tablespoon cookie scoop makes the next much faster and produces uniform cookies that are nearly exact in size. If you don't have one, no sweat, a measuring tablespoon and your hands are perfectly fine!
Scoop the dough, roll into balls with your hands, and place about an inch apart on a lined cookie sheet. The dough should roll very easily without leaving much residue on your hands.
Indent each ball of dough with your thumb, and smooth any cracks that appear with your finger.
Bake & Fill: Bake the cookies at 350 degrees F for 10 minutes, rotating the cookie sheets halfway through baking.
Remove the cookies from the oven for filling. If the indents puffed up a bit, grease the back of a measuring teaspoon and push the centers back down before filling.
Fill each indent with about 1/2 teaspoon of preserves. This is easiest if you use a piping bag or storage bag with 1/4" of the corner snipped off.
Once filled, continue baking the cookies in the oven for an additional 12-14 minutes, again rotating the cookie sheets halfway through. They will be finished baking when they are very lightly golden around the edges and bottoms. Do not allow the cookies to brown.
Rest & Garnish: Allow the cookies to rest undisturbed on the cookie sheet for 10 minutes. Transfer to a wire cooling rack after that time and allow to cool completely.
Garnish with confectioner's sugar and a sifter or mesh sieve before serving and storing.
Storage: Jam filled thumbprints keep best in a classic metal cookie tin for up to 3 weeks. Refrigeration makes them dry out and plastic storage bags make them soggy. If you do not have a cookie tin, you can store them in an airtight container on the counter or in the pantry.
Recommended Products
This post may contain affiliate links, which means I may make a small commission at no extra cost to you.


More From The Oven
New York Black and White Cookies
Chewy Ginger Molasses Crinkle Cookies