How to Can Jalapeño Peppers at Home
Last Updated on February 20, 2026 by Kiersten James
This is how I preserve garden-fresh jalapeño peppers to use all year long with an easy water bath canning method.

Whether I give the plants a ton of love or completely neglect them, my jalapeño pepper plants always thrive despite seasonal circumstances.
Two to three pepper plants seem to be the sweet spot where we can enjoy them fresh all summer long and slice the rest to can up for winter. Once the jars seal, they are good for at least a year in the pantry or basement.
Come fall and winter, we pop open a jar and add the pickled jalapeños to farmhouse chili, tacos, nacho platters, and the like. An open jar will keep in the refrigerator for 3 months without a problem.
If you are also overflowing with cucumbers in late summer, be sure to try my popular Amish sweet pickles for canning!
How to Can Jalapeño Peppers at Home
Recommended Supplies:
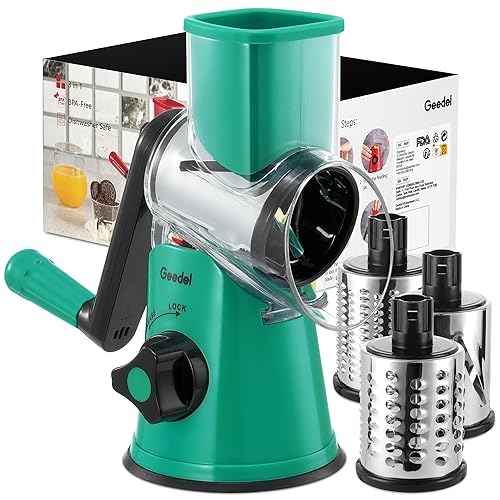
Rotary slicer (I use this for literally everything)
Wide-mouth pint mason jars for canning
Ingredients:
- 12 to 15 jalapeño peppers
For Each Pint-Sized Mason Jar
- 1/2 teaspoon mustard seed
- 1/2 teaspoon kosher salt
- 1 teaspoon whole peppercorn
- 1 dried bay leaf
- 5 garlic cloves, peeled
Pickling Brine for Canning
- 1 1/2 cup distilled white vinegar
- 1 1/2 cup water
- 4 1/2 tablespoons sugar
Instructions:
Using a rotary slicer, or by hand, slice each jalapeño pepper into thin, round slices. Discard the stem and core.

Bring a large pot of water to a low boil. Wash your jars, rings, and lids, then put them in the pot to sterilize. Keep the water at a simmer until you are ready to use the jars.

Add white vinegar to a small ramekin or bowl and place a small stack of paper towels beside it.
In a small pot, prepare the brining liquid by combining the white vinegar, water, and sugar. Heat over medium heat until it comes to a low boil.
Remove the jars from the pot using a canning jar lifter or sturdy tongs, and discard any remaining water in the jars.
To each clean jar, add the mustard seed, kosher salt, whole peppercorn, bay leaf, and peeled whole cloves of garlic.

Divide the sliced jalapeños among the jars, packing them in tightly until filled almost to the top.

Pour the brining liquid into the jars, filling to 1/2″ from the top.
Use a clean wooden skewer (as for kabobs) to poke down the sides of the jars to help release any trapped air bubbles.
With tongs, remove the jar rings and lids from the large pot of simmering water to paper towels or a clean dish towel.
Dampen a clean paper towel with white vinegar and wipe the rim of each glass jar.
Apply the lids and rings to each jar and tighten only until it is finger-tight. Not overtightening ensures that the lid stays on during the canning process but allows air and steam to vent out, which is critical for a proper seal.
Water Bath Canning:
1. Add hot water to the large pot of already simmering water until the water line is 3″ above the height of the pint jars when submerged.
2. Place the jars in the pot, cover with a lid and bring the water to a rolling boil.
3. Once the water is boiling, process the jars for 12 minutes. When time is up, remove the lid from the pot, turn off the heat, and leave the jars in the pot for 5 to 10 minutes.
4. Remove the jars from the pot with canning tongs and transfer to a cooling rack. Allow the jars to sit untouched for at least 24 hours.
5. Once sealed, remove the rings and double-check the integrity of the seal by lifting the jar gently by the metal lid. If it holds, the seal is good.
6. Label the jar with the canning date and store in the pantry or a dark place like a basement for 2 months before eating. This allows the pickling brine to do its job and develop its full flavor profile. Store any opened jars in the refrigerator.
6. Any jars that do not seal can be kept in the refrigerator for 3 to 4 months. Don’t forget to put the ring back on the jar before storing.


Easiest Canned Jalapeños
This is how I preserve jalapeño peppers from the garden to use all year long with this easy water bath canning method.
Ingredients
- 12 to 15 jalapeño peppers
For Each Pint Sized Mason Jar
- 1/2 teaspoon mustard seed
- 1/2 teaspoon kosher salt
- 1 teaspoon whole peppercorn
- 1 dried bay leaf
- 5 garlic cloves, peeled
Pickling Brine for Canning
- 1 1/2 cup distilled white vinegar
- 1 1/2 cup water
- 4 1/2 tablespoons sugar
Instructions
- Using a rotary slicer, or by hand, slice each jalapeño pepper into thin, round slices. Discard the stem and core.
- Bring a large pot of water to a low boil. Wash your jars, rings, and lids, then put them in the pot to sterilize. Keep the water at a simmer until you are ready to use the jars.
- Add white vinegar to a small ramekin or bowl and place a small stack of paper towels beside it.
- In a small pot, prepare the brining liquid by combining the white vinegar, water, and sugar. Heat over medium heat until it comes to a low boil.
- Remove the jars from the pot using a canning jar lifter or sturdy tongs, and discard any remaining water in the jars.
- To each clean jar, add the mustard seed, kosher salt, whole peppercorn, bay leaf, and peeled whole cloves of garlic.
- Divide the sliced jalapeños among the jars, packing them in tightly until filled almost to the top.
- Pour the brining liquid into the jars, filling to 1/2" from the top.
- Use a clean wooden skewer (as for kabobs) to poke down the sides of the jars to help release any trapped air bubbles.
- With tongs, remove the jar rings and lids from the large pot of simmering water to paper towels or a clean dish towel.
- Dampen a clean paper towel with white vinegar and wipe the rim of each glass jar.
- Apply the lids and rings to each jar and tighten only until it is finger-tight. Not overtightening ensures that the lid stays on during the canning process but allows air and steam to vent out, which is critical for a proper seal.
Water Bath Canning:
1. Add hot water to the large pot of already simmering water until the water line is 3" above the height of the pint jars when submerged.
2. Place the jars in the pot, cover with a lid and bring the water to a rolling boil.
3. Once the water is boiling, process the jars for 12 minutes. When time is up, remove the lid from the pot, turn off the heat, and leave the jars in the pot for 5 to 10 minutes.
4. Remove the jars from the pot with canning tongs and transfer to a cooling rack. Allow the jars to sit untouched for at least 24 hours.
5. Once sealed, remove the rings and double-check the integrity of the seal by lifting the jar gently by the metal lid. If it holds, the seal is good.
6. Label the jar with the canning date and store in the pantry or a dark place like a basement for 2 months before eating. This allows the pickling brine to do its job and develop its full flavor profile. Store any opened jars in the refrigerator.
6. Any jars that do not seal can be kept in the refrigerator for 3 to 4 months. Don't forget to put the ring back on the jar before storing.
Recommended Products
This post may contain affiliate links, which means I may make a small commission at no extra cost to you.

Save It For Later!